13.1.16

Dispersion, Dust, Dissolve Pixel Effect

Tutorial: https://www.youtube.com/watch?v=1fr29zAlLKc
I follow exactly what he did.

Brush Mixer
Layer Masking, Brush Tool
Brush setting

Then I use the same brush setting, use Brush tool and change the color to white, slightly brush on the girl, because I want it to look more 'realistic'.

Resource:


http://www.hellocaller.com/wp-content/themes/hellocaller/library/images/plax-girl_floating.png


Easy text face photo.


Tutorial: https://www.youtube.com/watch?v=bWVzl8kklAA

The lesson that I learned from this tutorial: USE SMALL FONT TO GET THE DISTORT EFFECT.

Thank you Joel. By the way, you really have face problem. ;)

10.1.16

Text face photoshop


Tutorial: https://www.youtube.com/watch?v=bWVzl8kklAA
There's a lot of short cut sharings in it.

I learned something new:
Alt+delete: fill whole layer with color.
Alt+shift: enlarge or minimize a photo by keeping its center.
And while using dodge tool, I learn that we can choose range to edit either shadows, midtones, and hightlights part.

Thank you to our dear Paddington Bear: Raf (model).


9.1.16

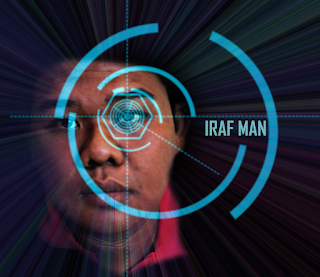
The making of Iraf man


Reference: http://abduzeedo.com/ironman-view-interface-effect-photoshop

I actually repeated everything in the tutorial, in a lazy way. :P
For the Illustrator part, its actually easier if we just save the file in psd, then move the layer in.
But if you follow the tutorial, you can use the blending option like what he did.

And in blending option, I used linear light for the effects, so that it is glowing.

Good luck on following the tutorial. :)

P/s: Thank you RAF to be my model. ;)

5.1.16

Displacement Maps to on T-Shirt design


https://www.youtube.com/watch?v=fzEqkiRZhgU

I followed the tutorial.

These are the references:

https://www.google.com/search?q=red+shirt&espv=2&biw=606&bih=581&source=lnms&tbm=isch&sa=X&ved=0ahUKEwjuy4_385fKAhXRGo4KHZYfAUEQ_AUIBygC


https://s-media-cache-ak0.pinimg.com/736x/df/02/7b/df027bf16fc9e39310657106ebf3d820.jpg


Ctrl+T: select tool
Ctrl+D: deselect tool

Filter > Distort > Undefined Areas > Wrap Around:
Because I choose a photo that have a background, so I choose wrap around instead of  repeat edge pixels.

Layer > Blending Option:
Over the scale, you can adjust settings by moving the arrow, and you can make it more detail by Alt+Click the arrow to split it to two.

3.1.16

Text Manipulation


How I did the Text Manipulation
1.       Create a new document
2.       Type “#2015Lastminutism”, and adjust the place I want it to be.
4.       Adjust the photo and change the opacity.
5.       Press Alt+Ctrl+G to create clipping mask.
6.       Save file, DONE.

Extra:
Ctrl+Alt+Z : UNDO
Ctrl+T: Select

(These two are very useful.)

25.12.15

Sharing session


This is PHLearn, a nice to learn YouTube channel.
I learn almost everything from this site. The rest I learn it from my sister and friends.

Guys, please have a good learning time. :)