17.9.15

My Works


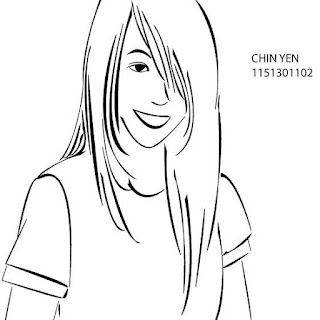
This is the first time using Adobe Illustrator, we change our own raster photo to vector image, it’s not a very hard process, and the hardest part is to make the outline smoother by using Delete Anchor Point Tool. Well… it’s still looks ‘rough’, but never mind; we did mistakes during learning process. J


This is my very first artwork in Adobe Illustrator. (Previous one didn’t count, because it’s only image tracing, vectors it by software and delete anchor points to make the outlines smoother.)
But this one also not that hard, we trace our own image by using Pen Tool.
Controlling the curves is the headache part. Still need more practices.


This is my sketch for first assignment, the theme is disability.
I make my point as I’m Possible. (From the quote Impossible itself says I’m possible.)
And Madam Ling says it’s better to focus on one object. So I made some changing afterwards.


This is the first try for the assignment, and apparently Madam Ling dislike the background (Too typical) and she prefer the word to be place on the eye level. So I made another try.
Tool used: Man (shapes and pen tool), Background (shapes, pen tool and gradient), and Words (Type, and to make the shadow thingy, I just copy and paste then change the colours.)

Second Try, I think it’s quite obvious that I run out of idea to improve the background, but surprisingly Madam Ling prefers this one. :D
I did some improvements on the shading. And the background I used Shape and Gradient. To make the shapes overlap nicely, I play around with colours and transparency.
And the “I’m possible” supposed to be in one line, but I lost the files, so… please imagine how it looks like in one line. Anyways, designing works is about imagination. ;)

This is my third try on assignment one. I try to focus on “I’m possible” only.
I try to make the ‘tools’ looks like splitting IM and POSSIBLE, and make some crackings on it… uhm it FAILS, but never mind, behind success it’s always been failures. (I’m optimistic, I know right.) :D
But I quite like the smiley and OKU sign thou. ;)


It’s for Malaysia Independence Day. PLEASE DO IGNORE THE SELAMAT BERDAULAT, I’m too blur that time.
I used all the colours in Malaysia flag. Orang Utan is used because it’s one of our country’s significant animals. I use pen tool for almost everything, except for the moon and typing.
As for the hibiscus… I think it’s pretty obvious, since it’s our nation flower.
And to show the years of independent, I drew a 58 on the flames, to represent its 58 years of MERDEKA.
Moon and star… that’s from our flag… It represents our different but united Bandar-bandar.


It’s some exercise in class… It’s quite rushing, so… please forgive me.
I’ve tried my best to make the texture obvious.
I used Pen Tool, Shapes, Brush, Reflects, Transparency and Gradient to finish this work.


This is my first try on assignment two, still the same theme: Disability.
The idea is to show the confidence of disabilities, it doesn’t matter who you are, it doesn’t matter you are different from physically or mentally, you are still the same as us.
Be more confident, stand out, and shout out your voices.
Alright, I like the OKU, U are more than OK J logo at the bottom left. TEHEE. J
But the typography still needs some work on it.

So here’s the second try.

TADAAAAAAA. J

Tool used: Pen Tool, Brush Tool, Blob Brush Tool, Mesh Tool, Blend Tool, Type Tool, Type on Path 

Tool, Create Outlines.
Girl: Pen Tool, Brush Tool, Blob Brush Tool.
Moon: Pen Tool, Brush Tool, Blob Brush Tool, Mesh Tool, Blend Tool.

Words: Type Tool, Type on Path Tool, Create Outlines.

Typography

This is a fun week, we learn about TYPOGRAPHY. Yeeehaaaa!
According to my understanding, Typography is an art about arranging the words, change the sizes, to make it looks more interesting.

After all, designer’s job is all about make everything looks interesting, in order to attracts people.
We also learn about serif and sans serif fonts. (In fact we did learned it in VRC classes, but it’s nice to learn again, it makes the impression stronger. And I like the way every classes’ lesson links together.)
In my case, to make typography easier, I would prefer to make the words that I typed in to shapes before I do any arrangement.
Type the words > right-click the words > Create Outline.
It’s easier for me, but it depends on your own likes.

References:


Gestalt design

Madam Ling show us Gestalt design.

And we get to recognize more famous artists:

 Philip Taaffe
Philip Moskowitz

Desktop Publishing

This week is about Desktop Publishing.
Madam Ling shows us another Adobe application: Adobe InDesign (Previously we used Adobe Illustrator).
And we got a new assignment to do.
I will show it later. ;)
Hope everything goes smoothly.

References:

Shapes

Now we learn about SHAPES.
This is the artwork from Henri Matisse, The Snail, 1953.
He is a very passionate artist. He lost his eyesight but he never gives up creating arts.
He can’t see, can’t draw, so he pick up the papers, cut and paste according to his imaginations.

And Madam Ling ask us to do the same thing, imagine, then form a clear image in our mind, cut it out.
Task: Grab a paper and cut out based on your imagination
Purpose: To train the power of visualization in design
Rule: No sketch is allowed. All purely in the mind.

References:

Colour Modes

We learned about the colour modes.

Common Colour modes are: RGB, CMYK, HSB, CIE, and others.

Amount of pixels are the one that deciding your image’s colour ‘interesting’ or not.
More pixels means that you can be more ’flexible’ to pick and enrich your colour tones.
(Alright, I don’t really know how to explain it, I’m trying my best. ;))

You can pick colours from Colour Pick.
Pick from this large area of colours which contains lots of different colour tones.

Or use percentage and numbers to pick the colours.


Or go to Colour Swatches to get the ‘usual colour’.

This week’s references (A lot):
Senior also recommended a web, and I found it’s also very useful:


Pen Tool

This week we learn about the ‘Pen Tool’ in Adobe Illustrator.
It takes some time for me to actually get used to it.

And I learned the ‘Add Anchor Point Tool’ and ‘Delete Anchor Tool’.
According to my experience, to make a curve smoother and nicer, it’s better to have fewer Anchor Point.
But when it comes to a very detail graphic, it should have lots of Anchor Point.
That’s how we decide to add or delete anchor point. And adding Anchor Point supposed to be on the path.  Well, deleting Anchor Point is just… picks the Anchor Point that you want to remove.
I think the hardest part is control the path, especially a curve path.
I think we will get better on that by practicing trace on different images.

We even learned about grids.

And I had a hard time to turn of the ‘Perspective Grid’.
At first I use a stupid and slow way to turn it off:
Top bar > View > Perspective Grid > Hide Grid
And after a long time… I only realise we there’s an icon on top left, we can just close it from there. Dumb me.
And Madam Ling asked us to do poems about dots and lines.
“It all started from a dot
To another dot
Then to another dot
Again to another dot
Till it forms
A shape”
This is hers.

This week’s reference:
https://bortonia.wordpress.com/tutorials/beginner/how-to-use-the-pen-tool/

Raster and Vector

Madam Ling gave us a detail lecturing about vector and raster images.


And this is the most direct way to check.
Or rather, in Adobe Illustrator or other similar apps, when you check the image, it shows ‘path’ and ‘anchor’, it is a vector image.
Vector-based files are usually these: *.EPS, *.AI, *CDR, or *.DWG.
Bitmap-based files are usually these: *.PSD, *.JPG, *GIF, *.TIF, or *.BMP.

And we get this question from Madam Ling:
Is this image vector or raster?

Most of us say Raster… and NO IT’S A VECTOR IMAGE.
It’s a graphic image, not a real thermometer… a real one will be raster image.

Alright, this week’s lecture reference links:

Computer Graphics


Madam Ling brief us about what we should and will learn from Computer Graphics.


And we did some mind map about the interactions between designers and our clients.


Roughly it will be:


CLIENT’S REQUIREMENT > ROUGH SKETCH > PRESENTATION > FINAL SKETCHES > GET APPROVAL > DONE (We would like to say get paid :D).


Then she shows us some senior works and we were like WOWWWWWWW.


And our task for first class is search for VECTOR IMAGE.


For example:


VECTOR FROM DESPICABLE ME (Just Kidding).


These are the real vector.(down here.)


The way to find out vectors is when you zoomed in those pictures; you can see the lines are clear and smooth. Otherwise it’s a raster image.


Madam Ling also suggested a useful app: Snap it.


It’s just like a screenshot function in our smartphones; the different part is it can snap a certain part that you want.


And she suggested these links to refer:


http://www.zilliondesigns.com/blog/12-malaysian-graphic-and-logo-designers/


http://www.1stwebdesigner.com/steps-designers-complete-project/


http://www.webdesignerdepot.com/2009/10/systematizing-the-graphic-design-process/


http://graphicdesign.about.com/od/graphicdesignbasics/ss/process.html